Pug's Kitchen

Telling the stories while sharing the recipes

  • Sticky Chicken Livers for Lockdown Lucy

    The one universal truth about lockdown is that being apart from our friends and family is the absolute pits. For me, the first eight weeks were the worst but what help me through, week on week, were the Zoom chats with nearest and dearest.

    Every Thursday, 6pm on the dot, Lucy, Simon, Stuart and I hold a virtual chat with real drinks in hand (sherry for Lucy, G&T for the boys, boxed wine for me) and laugh our way through the whole lockdown experience.

    This recipe is for Lucy as she is the only one of my friends who eats liver; when we eat at mine it’s usually liver and onions, if we out, it’s chicken in a basket from Côte. We’re all class. We have been for the 27 years we’ve known each other.

    A throwback of Lucy and Me to about 2005(?)

    This is a super simple recipe, yet it packs a huge punch. The smoked paprika brings an earthy sweetness while the dash of chilli brings a little fire. It’s best served on crunchy buttered sourdough or with plain rice. Whatever you serve it with, make sure you have it to hand as this is a really quick cook.

    Music to prepare this dish to: ‘Un Point C’est Toi’ by Zazie

    Ingredients

    • 400g Chicken livers, cut into medium sized pieces
    • 1 Onion really finely chopped (like grated fine)
    • 1 tbsp Mixed herbs
    • 1.5 tbsp Smoked paprika
    • ½ tsp Chilli flakes
    • 50g Butter
    • Glug vegetable oil
    • Splash Full fat milk
    • Salt and pepper

    Method

    1. Melt the butter in a large non-stick frying pan and fry off the onion and mixed herbs. Season well with your salt and pepper.
    2. After 5 minutes add the paprika and chilli flakes and mix into the onions. Once mixed, add your splash of milk to get a medium thickness paste consistency. Cook down for a few minutes and remove from the pan.
    3. In the same pan, add your glug of oil. Once hot, add your chicken livers and cook for a good four minutes.
    4. After four minutes, add your sticky sweet onion pulp mix and coat well, ramp up the heat and cook for a further three minutes.
    5. After three minutes, your livers should be cooked (best test one to be sure). Pour onto your toast and enjoy.

    This is quite a rich dish and works well with a rosé. You can try French, but the Syrosa Maremma Toscana is an Italian beauty that deserves its time in the limelight. It really cuts through the earthy, buttery richness.

  • My love letter to lamb

    Like many in the 1970s and 1980s, the meat we ate most often was chicken, then mince, followed by fish, followed by gammon. Lamb was a rarity and the very best roast beef was saved for Christmas dinner.

    But growing up, lamb was always a treat – be it a Sunday roast with mint sauce or Grandma’s lamb with special gravy. When we were told to slam in the lamb, we knew it was an important occasion – Easter, guests or just to empty the deep freeze to make room for more of mum’s cooking to be frozen for a rainy day.

    This is why you see me cook lamb more often than not. It’s not just meat, it reminds me of the happiest meals of my childhood. It’s all the best of memories evoked in one satisfying roast. In short, it makes me happy.

    Whizzing back to today and to another Saturday in lockdown, and another barbecue and another feast for the flames. This one I made up on the spot, counting on the lemon to keep the lamb juicy and the sauce tangy. Think of it as my love letter to lamb.

    When the roasting is done you have juicy lamb with a deep, rich sauce.

    I left the lemon husks in the stock during cooking – this gives the dish a deep, almost bitter umami flavour that you balance out with sugar/honey when you’re decanting the stock. If you’re worried, just leave the skins out.

    Music to listen to while preparing this dish: ‘Breathe’ by Blu Cantrell and Sean Paul

    Ingredients

    • 1.5kg leg of lamb
    • Juice/flesh of two unwaxed lemons (keep husks if using in stock, but not necessary)
    • 1 bunch of rosemary, leaves stripped
    • 2 onions quartered
    • 1 large clove garlic, quartered
    • 350ml dry white wine (I used a Viognier)
    • 2 litres of hot chicken/lamb stock
    • Olive oil
    • Salt and pepper
    • Runny honey/sugar (only if you are adding the lemon rinds to your stock)

    Method

    1. Rub the lamb with the olive oil and put it in a roasting dish that can sit on your barbecue. Season with salt and pepper.
    2. To the pan add your lemon juice and flesh, rosemary, onions, garlic, white wine and 1.5 litres of your stock.
    3. If you are adding the lemon rinds, add them now.
    4. Cover your pan with a loose fitting lid or tin foil and put over your prepared coals (you know the drill, when they are covered with a fine coating of ash).
    5. Roast for one hour, with the BBQ vents open. Remove foil, turn the meat and top up the stock if necessary – which it will be.
    6. After 30 mins, check your levels again, you really don’t want the stock to dry up.
    7. After a total roast time of 1hr 45mins remove the lamb from the BBQ and decant your juice to a pan. Reduce/add stock to suit your preference,
    8. Remove the lemon rinds if used and taste – if it’s on the bitter side, add a tablespoon of honey and mix through. It should balance the flavours while keeping that deep umami sensation. Use as much honey to suit your taste but don’t make it too sweet.

    Serve with the carved lamb and cubetti potatoes.

    Drink with a Craggy Range Sauvignon Blanc 2019 – it may be young but it has a depth and a light acidic touch that belies its age.

  • Rösti – A reward for your lockdown

    Lockdown has been good for some, less so for many and excruciatingly dull for almost everyone. I know how I dealt with the first six weeks – by filling myself full of pasta, tinned rice pudding and tuna bake. It all felt so very 1970s…

    With the longer days and the relaxing of lockdown rules, I started to exercise more, eat less and generally get back into a routine of fitness and fine food. That said, there are times still, when all I want to do is carb-load.

    I’m in a frame of mind where I feel I should put in some effort to be rewarded for my incoming carbs, and this dish requires some serious arm strength… so you can fill your belly guilt-free.

    You need a serious amount of elbow grease to get the potato ready for your rösti

    I first had rösti (potato cakes) way back in 1996. I was briefly a tour guide with EF and I returned to Paris via Zurich. I was at the main station with a few hours to kill before my train, so took a seat at the rösti bar and ordered mine with smoked ham and a fried egg. It was so deeply satisfying that I am still making it decades on and I still get that same, full-belly satisfaction I had back then.

    Music to listen to while preparing this dish: ‘The Best of Soul Train’ by Soul Train (it’s a compilation of the best from the TV programme…

    Ingredients

    • 1 Extra large potato (or two medium), grated
    • 1 Large onion, finely chopped
    • 1 Tablespoon of sage (or rosemary or thyme), chopped
    • Salt and pepper
    • A seriously strong grip
    • Vegetable oil for frying

    Method

    1. Put your grated potatoes into the centre of a clean tea towel and wring as much liquid out as you can.
    2. When you think you’re done wringing, give it one more twist.
    3. Once you’ve given yourself a dead arm with all the wringing, mix the potatoes, onion, herbs and salt and pepper in a bowl until well combined. Add a good whack of salt, this dish can take it.
    4. Divide into two equal-sized thick patties. I used the largest sized cookie cutter I had to shape mine.
    5. Shallow fry in your oil over a medium-low heat for a good 7-8 minutes on each side.
    6. Raise the heat a little to medium, and fry for a further 5 mins each side. You want the rösti to be crisp on the outside and gooey in the middle.
    7. Remove from the pain and drain on some kitchen paper while you fry your egg and/or bacon in the pan in which you’ve just cooked your rösti.

    If you’re going to carb-load, do it style and polish this off with a large glass of Swiss white. If you can find one, a Clos de Chillon would be fab – it really cuts through the salty stickiness of this dish.

  • Lamb & Haggis Hotpot for the Long Lockdown

    Like everyone else,  this has felt like the longest of lockdowns – hours stretch into days, days into weeks and so it goes on and on…. and on. But despite the boredom, there has been some good come from all this. I’ve got to know my neighbours a lot more than before. Running errands for the shielded, ordering microwaves for the digitally unconnected and hanging out on my balcony getting blutered with my next door neighbour. The less said about that last chapter, the better.

    As I naturally cook enough to feed the 5000, I’ve been sharing my food among the neighbours, and the following went down a treat. It may seem an odd one to have while the heat is up, but at the end of the day it’s meat and potatoes and it tastes absolutely fantastic.

    The key to this dish is don’t tell people that there is haggis in it. People turn their nose up at the idea of haggis without having actually tasted it. It brings a manageable peppery fire to the dish with an earthiness that is deeply satisfying.

    To get the potatoes really thin, I used a Swiss potato peeler (pic below) – it makes the spuds go further while producing wafer thin slices which really bind this dish together.

    Potato peeler
    The Swiss potato peeler (I think that’s what it’s called)

    This is a one-pot dish, so if you have a casserole dish that works on the hob, in the oven and as a serving dish… perfect!

    Music to listen to while preparing this dish: ‘Star Maker’ by the Kids of Fame

    Ingredients

    • 800g Lamb mince
    • 800g Potatoes, thinly sliced
    • 2 Large onions, sliced
    • 2tbsp Dijon mustard
    • 350g MacSweens Haggis, crumbled
    • 330ml Lamb/chicken stock (warm)
    • 1tbs Thyme leaves
    • Salt & pepper
    • Olive oil
    • Melted butter

    Method

    1. It’s a low-n-slow cook for this dish, so preheat your oven to 160 degrees (fan).
    2. Heat some olive oil in the pan (not too much as both the lamb and the haggis will produce more fat) and brown off the lamb mince and season with your salt and pepper.
    3. Once browned, remove the lamb then sauté the onions in the lamb juice, season with a little salt and pepper (being mindful you’ve already seasoned the lamb). After about 10 mins they should be soft, golden and translucent – it’s at this stage you need to add the thyme leaves, the cooked mince and mix well. Remove the mix from the pan and remove the pan from the heat.
    4. It’s time to bring this bad boy together… In your pan add a layer of your thinly sliced potatoes. On top of this scatter over one third of your lamb mix, getting an even spread. Then crumble over this one third of your haggis mix. When you have an even layer, dot the lamb landscape with some of your Dijon mustard. Top off with another layer of your wafer thin potato slices.
    5. Repeat until you have three layers of mince mix and then top it off with a final layer of potatoes.
    6. Gently pour over your warm lamb stock and bake, covered, for 90 mins.
    7. After 90 minutes, remove the cover from your hotpot and brush the top layer of the with your melted better. Be brave, slather it on and pop the dish back in the oven uncovered for 30 minutes.
    8. After this 30 minutes, the top of your hotpot should be crisp and golden and ready to serve. And you should be hungry enough to polish off a good portion of it.

    As mentioned at the top – it’s a great sharer should you be in the mood to share but it also keeps for days and tastes great when warmed through.

    I like a lightly chilled Les Volcaniques Brouilly to cut through the richness of this dish – it’s one of those Beaujolais that while packing a punch (14%) chilling it makes it more palatable.

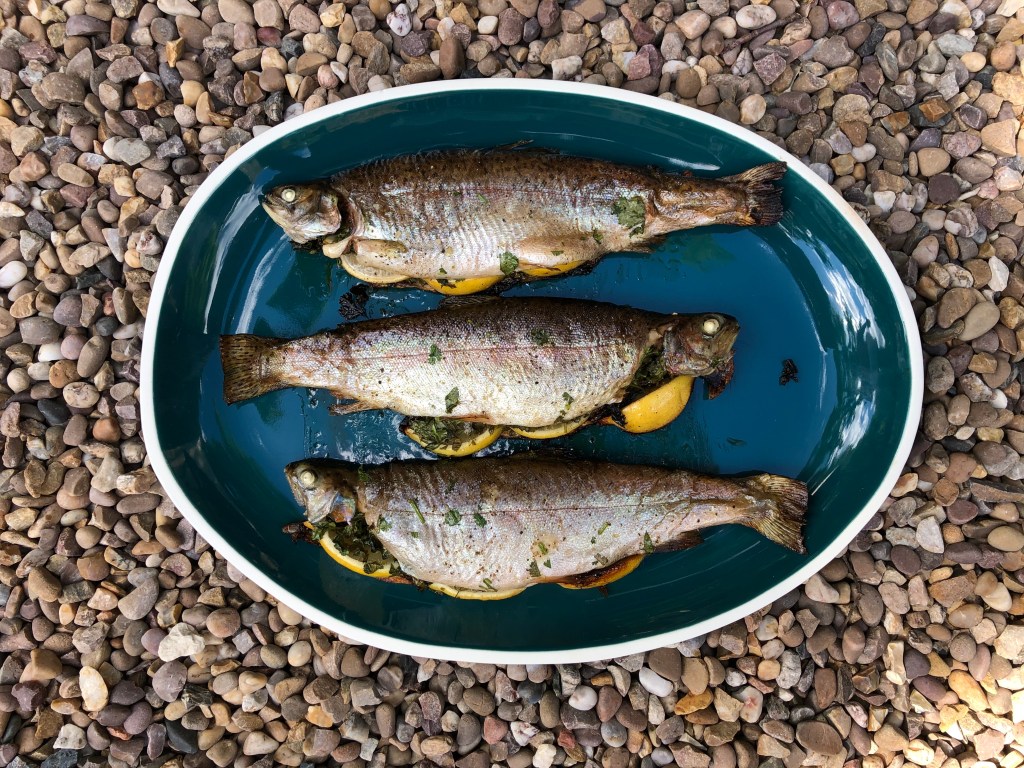
  • Rainbow Trout for an Old Trout

    So for Damien’s birthday (the old trout of this recipe’s title) we kicked off with a French 75 cocktail and griddled a few racks of lamb for the carnivores. For the pescatarians, I made some stuffed rainbow trout, learning from the lessons of the previous BBQ Beauties, making these both crispy and moist.

    This recipe feeds 6-7 people when there are other BBQ options and is best served with a dollop of mayonnaise and a squeeze of lemon and a very crisp white wine… which one I prefer is at the bottom of this recipe.

    Last time I did fish on the griddle, the skin stuck to the foil. For this occasion, I used a non-stick tray that went straight on the BBQ. There’s no shame in wanting crispy skin and a fish that lifts easily from BBQ to presentation plate.

    Prepared Trout
    Trout ready for the BBQ – waiting for a drizzle of olive oil.

    Music to listen to while preparing this dish: ‘Shiny Happy People’ by REM

    Ingredients

    • 3 whole, cleaned rainbow trout
    • A large bunch of coriander, chopped (stems and all)
    • 2 Lemons (juiced and remainder cut into long quarters)
    • 3 large tablespoons salted butter
    • Salt and pepper
    • Olive oil

    Method

    1. In a bowl massage the lemon juice into the chopped coriander and a sprinkle of salt and some black pepper. You want to make a really wet mulch. A good five minutes should do this.
    2. Put your fish in your non-stick tray and push and spread a tablespoon of your butter inside the cavity of the fish, along the spine. Repeat for the other two.
    3. Stuff each of your fish with your coriander mulch. You’ll have enough to give each a jolly good stuffing.
    4. Use your lemon wedges to ‘seal’ the mulch into to the fish (usually three wedges per fish – see photo) and drizzle with olive oil.
    5. When your coals are ready, transfer your dish to the grill, close the lid and leave for 10 minutes.
    6. After 10 minutes, flip and leave for another 7 minutes. Your fish should now be ready… if not, leave for another couple of minutes.

    A great wine with this is a lovely Alba Barrique Malvazija Istarka from Croatia – it’s mineral rich and briny. Perfect for this dish

  • Bone-picker BBQ Lamb Ribs for Damien

    Last week, as mentioned in my last post, we kicked off Damien’s birthday with a French 75 cocktail. However, we broke the Golden Rule of Cocktails and had, on average, three. So the tone for the day was well and truly set.

    With the guests being as marinated as the lamb, we had to get it cooking quite quickly.  We needed something sticky and satisfying to line our stomachs.

    This dish uses six three-rib lamb racks, untrimmed. You need to keep as much fat and skin on the lamb to get a sticky sweet crust which keeps the meat deliciously moist as it gets roasted directly over the hot coals.

    Follow this easy recipe and your guests will be picking the bones for the last scraps of meat hours after the coals have died down.

    Bonepicker lamb ribs
    Bonepicker lamb ribs – sticky, and indulgent

    Music to listen to while preparing this dish: ‘Good Vibrations’ by The Beach Boys

    Ingredients

    • 6 racks of lamb of three chops each
    • 350ml Olive Oil
    • 2 tablespoons Dijon mustard
    • 1 Rosemary bunch with the leaves chopped
    • An extra 6 sprigs of rosemary, intact
    • 2 Lemons – juiced with the rinds cut in 4 pieces each
    • 1/2 Tablespoon salt
    • 2 Resealable food bags

    Method

    1. Skewer each of your lamb racks with your sprigs of rosemary – right through the centre of the chop. Trim the woody base as this could puncture your food bag while it marinates.
    2. Mix the olive oil, lemon juice, chopped rosemary and salt until they are well combined and divide the mixture between your two food bags. Divide the lemon rinds between the two bags and add your racks of lamb – 3 per bag.
    3. Squeeze the air out of the bags and seal, making sure the marinade is coating each of the racks and none of your rosemary skewers are puncturing the bag. Leave to marinate for at least 4 hours, preferably overnight, in the fridge – making sure to agitate the bags every now and then to make sure the marinade does its job.
    4. Once the coals are ready (you know the drill – fire up the BBQ then let the coals get a covering of ash) put your racks, skin side down, on the grill and close the lid. Don’t look at it for at least 15 minutes.
    5. After 15 minutes check your racks, they should be dark, really dark, and sticky. If they are turn them over (if not leave another five minutes). Add the lemon rinds from the marinade to the BBQ at this point – they make for a great presentation.
    6. After another 20 mins your racks are done. Present them on a bed of rocket on a chopping board with the griddle lemon rinds.
    7. Carve to the sound of the ‘Ooohs’ and ‘Aaaahs’ of an inebriated crowd.

    If you haven’t drank your fill already, try this with a Barberous Domaine Capmartin – an easy drink but not bland it packs a fistful of delicate spice but isn’t too fruity.

  • The Class of ‘French 75’

    Last week was my best friend, Damien’s, birthday so to celebrate we threw a lockdown BBQ with the permitted amount of people from the permitted number of households. And as every celebration should, we kicked off with a cocktail.

    Cocktails can be a faff – and truth be told they always taste better when made by someone else. I learnt to make the staples while working in a restaurant in Paris… I’m no mixologist, but I do make a mean martini.

    The French 75 has always been a favourite of mine – it is simple, needs no cocktail kit and has a degree of flexibility. The ‘Savoy Cocktail Book’ and ‘The Art of Mixing Drinks’ both have recipes for French 75. One uses gin, one uses cognac, both are served in long glasses over ice and both use sugar.

    French 75 recipes
    Two recipes, one drink and no agreement

    Like its country namesake, the French 75 has had a revolution… I’ve only ever used gin; I’ve never used sugar and have only served in either a flute or a coupe without ice. This is standard.

    So, here’s how to make a classy cocktail without the fuss of a shaker… but don’t forget the golden rule of cocktails; they are like boobs or legs* – one isn’t enough, two is just right, and three is too many.

    * Use the appropriate analogy for your audience.

    Music to listen to while making the French 75: ‘C’est si bon’ by Eartha Kitt

    Ingredients

    • 1 measure Gin (Gordons is fine, Pink Gin if you’re feeling fancy)
    • ½ measure Lemon juice
    • A slither of Lemon rind
    • Champagne

    Method

    1. Pour the gin and lemon juice into a chilled Champagne flute or coupe and swirl to mix.
    2. Top up with champagne, add the lemon rind, serve.
    3. Don’t drink too many.
  • Unexpected item in the bagging area: Goose Eggs

    Growing up in the home counties, we were spoilt for space which my mum, my Bermondsey Belle, decided to fill with animals. Her favourite by far was a beautifully proud goose, imaginatively called Onky.

    I’ve not thought of Onky in about 40 years, until the other weekend, at the socially-distanced farmer’s market, when I saw goose eggs for sale. I’d love to regale you with stories of how lovely Onky was and how productive she was in the egg department. Truth is she was a fiery, wilful beast who, as far as I can remember, only ever produced one egg. In all her days, one egg. Just the one.

    Omelette
    The finished dish – well half of it – with a simple leaf and caper salad

    When I saw these goose eggs at the market, I snapped them up. If you’ve never had a goose egg, try it with this simple omelette recipe. Goose eggs are rich, fatty, eggier than other eggs and the nuttiness and creaminess of the comté compliments the richness of the egg without smothering it. Serve it with a simple caper and leaf salad dressed with Claudie’s vinaigrette.

    Music to listen to while preparing this dish: ‘All Right Now’ by Witch Queen

    Ingredients (serves two)

    • 4 Goose eggs
    • 1 Large onion chopped finely (red or white, your choice)
    • 50g Unsalted butter
    • 50g Comté cheese finely grated
    • Salt and pepper

    Method

    The key to this recipe is patience. The eggs, like the chef, should be ‘neither hurried nor harried’ (MFK Fisher).

    On a very low heat, melt your butter and slowly fry, almost confit, your onions making sure you season them with your salt. Expect this to take at least 20 mins as your eggs shouldn’t be brown, they should be a sweet sticky mess.

    While your onions are frying down, grate your cheese ready to sprinkle at the end.

    Now’s the time to prepare the eggs. Cracking them is half the fun. You’ll need strong wrist action – there’s a video on our effort below (excuse the mild swearing). Whisk gently – you don’t want a homogenous mix, you want to see a little distinction between yolk and white… it’ll give your omelette texture.

    Once your onions are smelling sweet and look translucently beautiful, it’s time to pour your eggs over. Do not turn up the heat, keep it very very low.

    Stir the egg mix gently, ensuring the onions are evenly distributed. You’ll see that the gg is starting to cook and as you stir, more of the mix will cook. Keep stirring but stop once the mix becomes firm – you want an omelette not scrambled eggs. At this stage the bottom will be firm and the top slightly runny.

    At this point, evenly sprinkle your cheese over and let the heat start to melt it a little. Once it’s a little melted, fold the omelette in half and then slide on a plate.

    Add your side salad with vinaigrette and you’ve a perfectly decadent lunch for two. Add a glass of Bianco Maggiore and you’re all set.


  • Sauerkraut with Clove Ham

    Like everyone else during lockdown, I’ve had one thing in surplus despite all the panic buying… time. So I put that time to good use and made myself some sauerkraut. And there are three things I have learnt: there’s a lot of chopping, you need a lot of patience and, finally, the result is delicious.

    So here’s a take on one of my favourites from the brasseries around Gare de l’Est in Paris; a clove roasted joint of ham with homemade sauerkraut. This makes a lot, so have plenty of large jars handy.

    Music to listen to while preparing this dish: ‘Souvenirs de l’Est’ by Patricia Kaas

    Ingredients for the sauerkraut

    • 2 Large white cabbages (this is traditional but you can use any you like, I added carrot to mine but no real need, I just had some spare). This should weigh in around 2kg
    • 6 tbsp Maldon Sea Salt – I’m not normally a snob for salt but this will make the initial prep easy
    • 2 tsp Pink peppercorns (caraway seeds are traditional, I’m just not a fan)

    Ingredients for the roast ham

    • A 1kg unsmoked gammon joint
    • 36-ish Cloves
    • 2 Star anise

    Method for sauerkraut

    1. Deep clean a very large mixing bowl – it needs to be big enough to hold your cabbage with room to spare.
    2. Shred the cabbage finely – a food processor makes quick work of this. If you don’t have one, take your time with this stage and slice finely, it’ll pay off in the next stage.
    3. Tip your cabbage into your bowl, sprinkle over the salt and massage it through the cabbage for a good 10 minutes. You’ll be glad you used flakes not crystals as they absorb more easily.
    4. Take a rest for 10 minutes then massage the mix for another 10 minutes. After this your cabbage should be a much-reduced mulch sitting in its own juice.
    5. Add the peppercorns and mix them through.
    6. Weigh the cabbage down with a few clean plates so the cabbage is covered with its brine. Cover the bowl with its lid and leave in a dark, cool place for a minimum of a week. Be careful how you store it: too cold and the fermentation will take longer, too hot and it may get mouldy so no more than 19 degrees.
    7. Check every day to remove and scum, give it a stir and check it’s fermenting nicely.
    8. After a week it is ready to decant into your sterilised jars and for storing in the fridge, but you can leave it longer. The longer you do leave it, the more sour it becomes. I find a week is enough.

    At the end of a week, your sauerkraut should look like this

    sauerkraut
    My sauerkraut after a week’s fermentation – decanted and ready for its jars.

    Now you’ve done the veg, it’s time to get the meat on the go….

    Method for roasted ham

    1. Heat the oven to 170 degrees (fan).
    2. Remove all the packaging from your ham and put in a low roasting tin.
    3. Prick the large, wide, rounded sides with some kitchen tweezers – you’ll need around 18 small holes per side.
    4. Push your cloves into the holes on both sides. Push a star anise in among the cloves on each side.
    5. Put the ham in the tin so one side of cloves is tin-side down while the other is facing up.
    6. Cover with foil and roast. After 45 mins remove the foil and roast for a further 30 mins (1hr 15mins in total)
    7. Once cooked, remove from the tin and let cool under some foil.
    8. Once cooled, use your kitchen tweezers to remove the calve and then carve your ham.

    You’re now ready to assemble your dish… so gently warm a portion of the sauerkraut with a little of its brine and serve with a generous amount of sliced ham and an even more generous dollop of Maille Dijon Mustard.

    Serve with a Big Fine Girl Rieslingfrom the Clare Valley

    Clove ham and sauerkraut
    The finished dish – one week and a lot of massaging makes for a great and healthy dish.

    The finished dish – one week and a lot of massaging makes for a great and healthy, dish.

  • 3 Beauties for a BBQ

    Whether we are still in lockdown or not, if you’re in the Northern Hemisphere, the weather is on the up and it’s time to start cooking in the great outdoors.

    These three recipes are variants on others I have here in the Pug’s Kitchen library, just tweaked for the great flame. As ever, it’s all in the preparation,

    Music to listen to while preparing these dishes: ‘Burning Down the House‘ by Tom Jones and the Cardigans

    And if you’re tackling these, you may want to whet your appetite with something as smoky as your coals… try a Villa Baulieu Blanc from Provence… you’ll deserve it

    Chicken

    First up is the humble yet mighty chicken. As ever, I always like my food to create oohs and aahs and a BBQ is no exception. To cook a whole chicken you’re going to have to spatchcock it. It’s not that difficult though you will need a strong hand and some solid kitchen scissors.


    Ingredients

    • 1 Medium chicken
    • 1 Bunch of tarragon
    • 1 Lemon, quartered
    • 1 Onion quartered
    • Olive oil
    • A large handful olives
    • Salt & pepper
    • 3 tablespoons of salted butter, melted
    Method
    1. First spatchcock the chicken by putting it breast-side down, with the legs towards you.
    2. With a steady hand and your solid scissors cut up along each side of the parson’s nose – basically either side of the backbone. All that cracking and crunching you’ll feel is the rib bones breaking. Once you’ve done, remove the backbone and keep it for stock.
    3. Turn the bird over and flatten it. Be prepared for some more cracking.
    4. Well done you! You’ve spatchcocked your first bird.
    5. Now loosen the skin under the breast, the thighs and the drum sticks – this is where you are going to heap in all the herbs, between the skin and the flesh. This way the flavour stays in the meat and doesn’t get burnt off in the BBQ.
    6. Transfer it to a disposable tin tray. Squeeze the lemon quarters ov the bird. Once squeezed, put two lemon quarters under the chicken and two around it. 
    7. Nestle your onion quarters around the chicken.
    8. Drizzle with olive oil and season with your salt and pepper. 
    9. Your chicken is now beautiful and almost BBQ ready
    10. Loosely cover the chicken with foil and place it on your BBQ (you know the drill, once the flames have gone and the coals are covered in ash)
    11. After 45 minutes remove, the foil add your olives and baste the bird with some of your melted butter. Repeat basting after ten minutes, and another ten minutes.
    12. Once your chicken has been barbecuing without its lid for 30 minutes you re ready to serve.

    And it should look like this:

    PORK

    This is exactly the same as my Dad’s Roast Loin of Pork – for this recipe I wanted a fresher stuffing for summer so I stuffed it with tons of freshly chopped coriander and the zest of one lemon. But the key here, as in life in general, is to wrap it in bacon or prosciutto.

    Method

    1. This is a real easy one to cook on the BBQ! Once you have wrapped it in your bacon or prosciutto, loosely wrap it in foil.  
    2. Place on the barbecue and broil for 20 mins. NO need for a roasting tin.
    3. Open the foil and then BBQ for another 10 mins. It should be ready but as always, check first.
    4. Slice and squeeze over the juice from the lemon you zested for the stuffing.

    It should look something like this:


    Music to listen to while preparing this dish: ‘An American Trilogy’ by Elvis Presley

    Fish

    This is exactly the same principle as the Dad’s Roast Loin of Pork I cooked a long while back. Take whole white fish and stuff them with herbs, butter, garlic, lemon – it’s your BBQ you choose what goes inside.

    Method

    1. Once stuffed put the fish in a disposable roasting in and scatter lemon wedges around
    2. Season well, drizzle with oil and cover loosely with foil.
    3. Chuck ’em on the barbecue for around 20 mins, removing the foil for another 5 minutes.

    They should be done but as ever always check first. At the end they should look like: